Are you TIRED of having you hair bows, bow-ties, sunglasses, or necklaces in a tangled mess,
with no hope in sight for organizing them?

Well i have the PERFECT solution for you! AND its super simple.
All you need is:

1. Picture Frame (without the glass or backing in it)
2. hot glue gun
3. clothes pins (how ever many you want to use)
4. ribbon
5. Staple gun
6. scissors

First measure out your ribbon on the BACK side of the picture frame. After you lay it out, you can cut it to the correct size that you need.
TIP: I like to use a wide ribbon because the clothes pins fit better and are more secure on it.

Next staple one end of your ribbon. On the opposite side pull the ribbon taught (tight) and staple. Don't worry if there is extra ribbon, you can cut it off and it wont effect anything.
Make sure your ribbon is tight, so that when the clothes pins are on it, it doesn't sag.
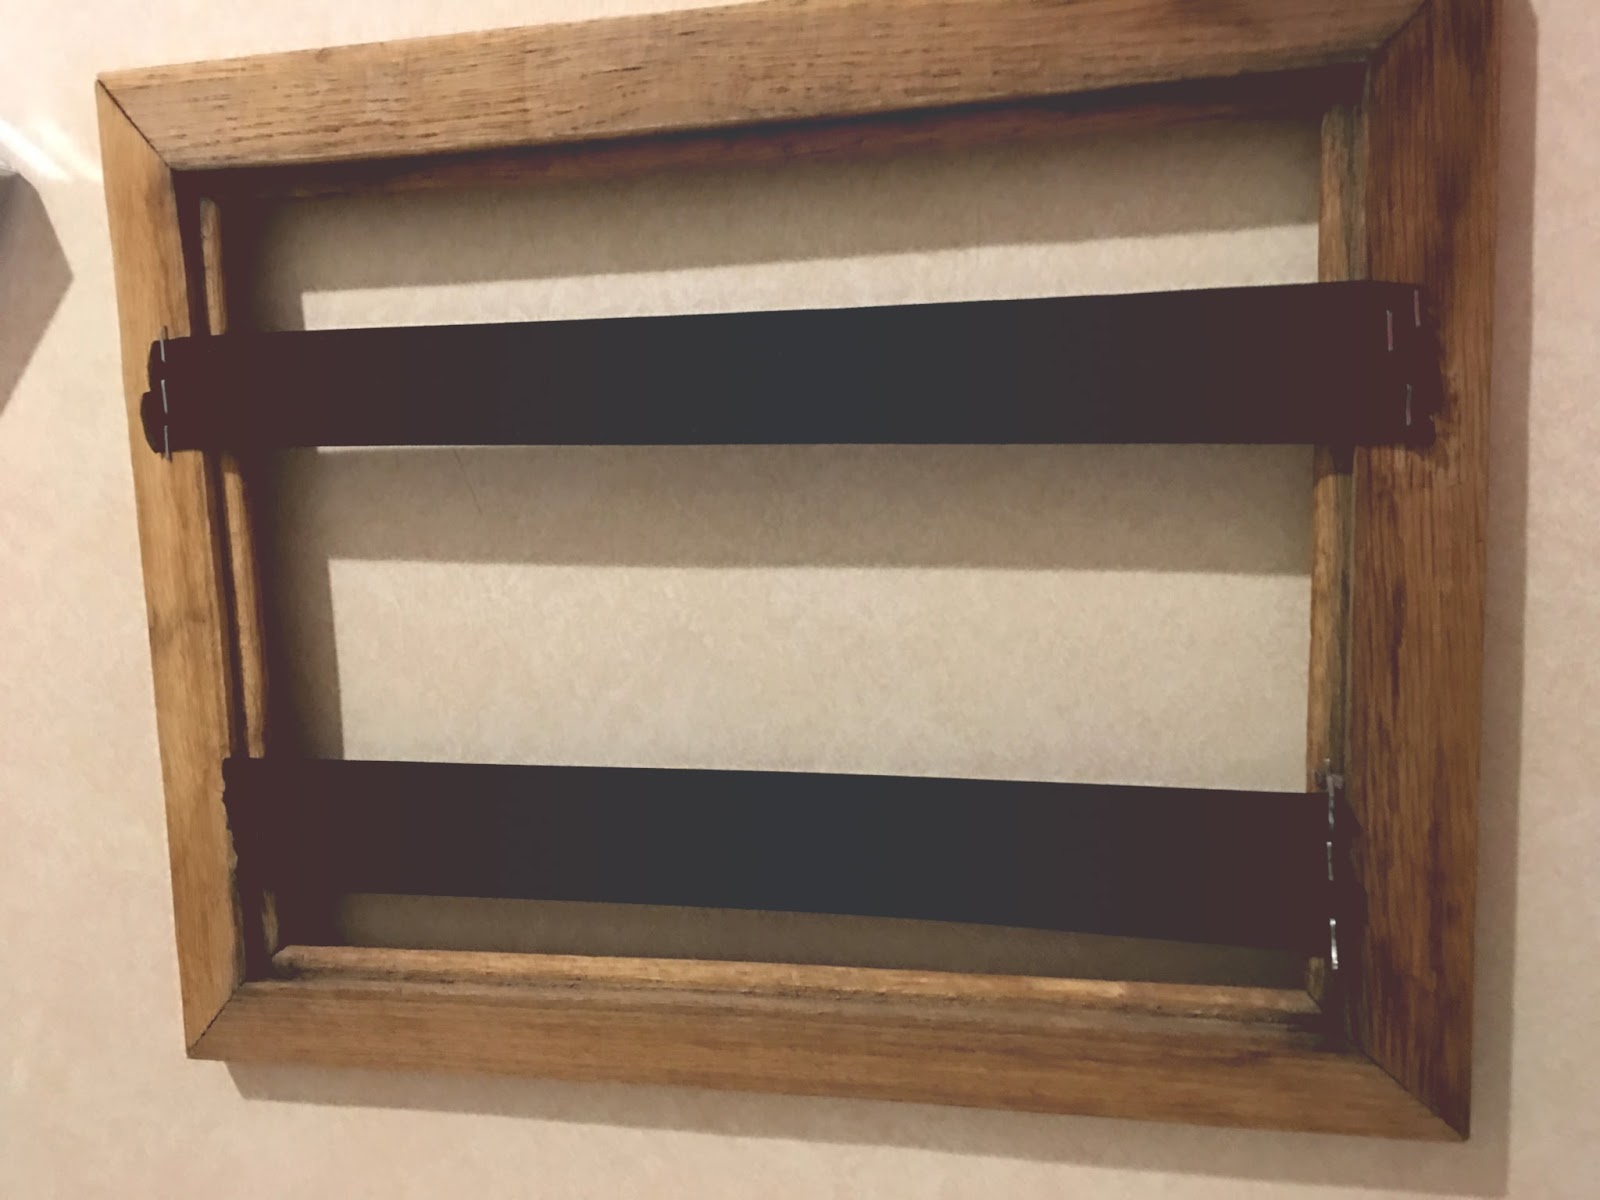
This is what the backside looks like after that step. I had to staple my ribbon in multiple places so that it would not bunch strange. I also placed one ribbon onto the sides where the glass would rest, and the other ribbon onto the back of the picture frame. Varying depths will help your accessories lay better.

Next place your clothes pins where you think you want them. You can play around with this step and see what suits your needs. Because my picture frame is smaller, i did not use very many clothes pins. So depending on the size you use, you can use more or less!

Next hot glue the ribbon where you are going to place the clothes pin, and set the pin in place! It should be quite secure, even with rough handling.

And here is my finished result. I just hang it on the wall as added filler to a gallery wall in my sons room.

You can use this process for almost anything!! I even did it for pictures, as a fun way of displaying them in my living room...

I hope you enjoy this DIY and are inspired to try it yourself!
I'll talk with you next week!
-Hannah
No comments:
Post a Comment